Freezer frost has been on my mind since 2021. I really do not know why, of all the types of ice, I crave this the most. Search for ice on Instagram, and you’ll find it among the top results, as it’s a favorite craving for many — especially late at night.
Thus, you must know how to make it safely. Do not go and scrape any frost or ice and eat it. It is a no-no. Most of the TikTokers who are doing eating frost bought a new freezer and humidifier just for this. It is cleaned regularly and does not come in contact with food.
You should never eat frost from a freezer where you store meat and food because it is full of harmful bacteria that can make you sick. This post will break down the best ways to make Frost that you can scrape and eat at any time of the day.
Freezer Frost Ice Is Satisfying And Safe When Made Properly
Let’s get this clear: freezer frost is just frozen water vapor. It forms when moisture in the air hits cold surfaces inside your freezer. Similarly, it creates that powdery, crunchy texture that many people love.
Freezer frost is only dangerous when it comes from freezers that store food because it collects bacteria, food particles, and contaminants.
When you make frost from a freezer whose only function is just that, it is far safer to eat. It is better this way since you can control the ingredients and cleanliness.
Do You Need A Humidifier To Make Freezer Frost?
The best thing you can do when making a lot of freezer frost is to use a humidifier.
A humidifier adds moisture to the air, creating frost buildup in your freezer.
Whenever you are using your humidifier in the freezer, make sure it has distilled water.
How To Make Freezer Frost Ice At Home?
The good news is that there are plenty of ways to make freezer frost ice.
Step 1: Gather Your Supplies
The most important step is to make sure you have the right supplies. You will need:
- Filtered or distilled water
- Ice cube trays (silicone is best)
- A strong blender or high-powered food processor- I saw on TikTok where you can place the blender jug in the freezer for 12 hours before blending.
- Clean baking sheets
- Plastic storage containers
Make sure all your equipment is clean and dry before you start. Wash everything with hot soapy water and rinse well.
Step 2: Make Clear Ice Cubes
First, boil your filtered water. This removes air bubbles that cause cloudiness. Let it cool to room temperature. If you love the cloudy ice, then skip this step. I love this type of ice.
Pour the cooled water into your ice cube trays. Fill them. Place them in the coldest part of your freezer.
Leave them for at least 4 hours or overnight. The ice should be completely solid.
Step 3: Blend Your Ice Into Frost
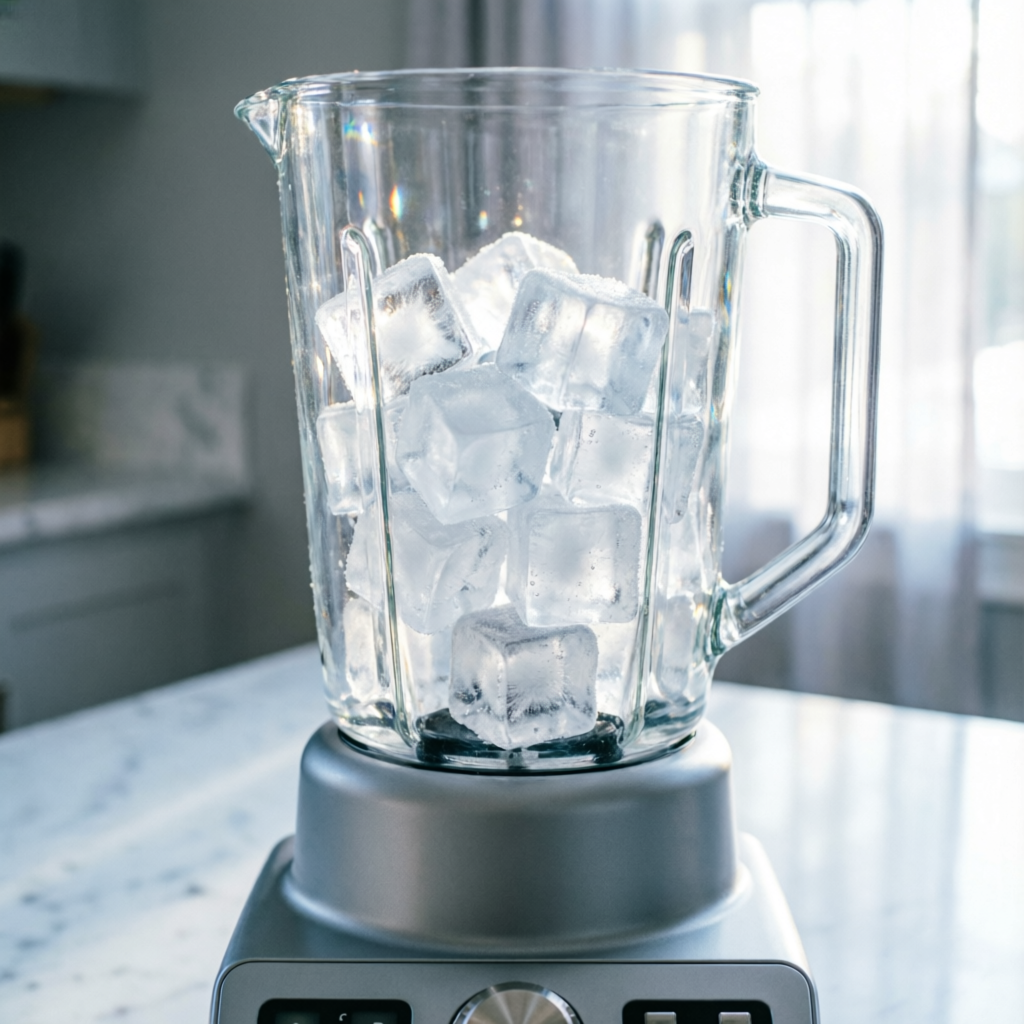
Once your ice cubes are frozen, remove them from the trays.
Now you are ready to blend:
Add Ice To Blender: Place 4-6 ice cubes into your strong blender. Do not overfill. You want the blades to move freely.
Pulse First: Start with short pulses. This breaks the ice into smaller pieces without straining the motor.
Blend On Low: Switch to low speed. Blend for 10-15 seconds. Watch the texture closely.
Check Consistency: Stop and check. You want fine, snow-like frost. If pieces are still large, pulse a few more times.
Do Not Over-Blend: If you blend too long, the ice will turn to slush. You want dry, powdery frost.
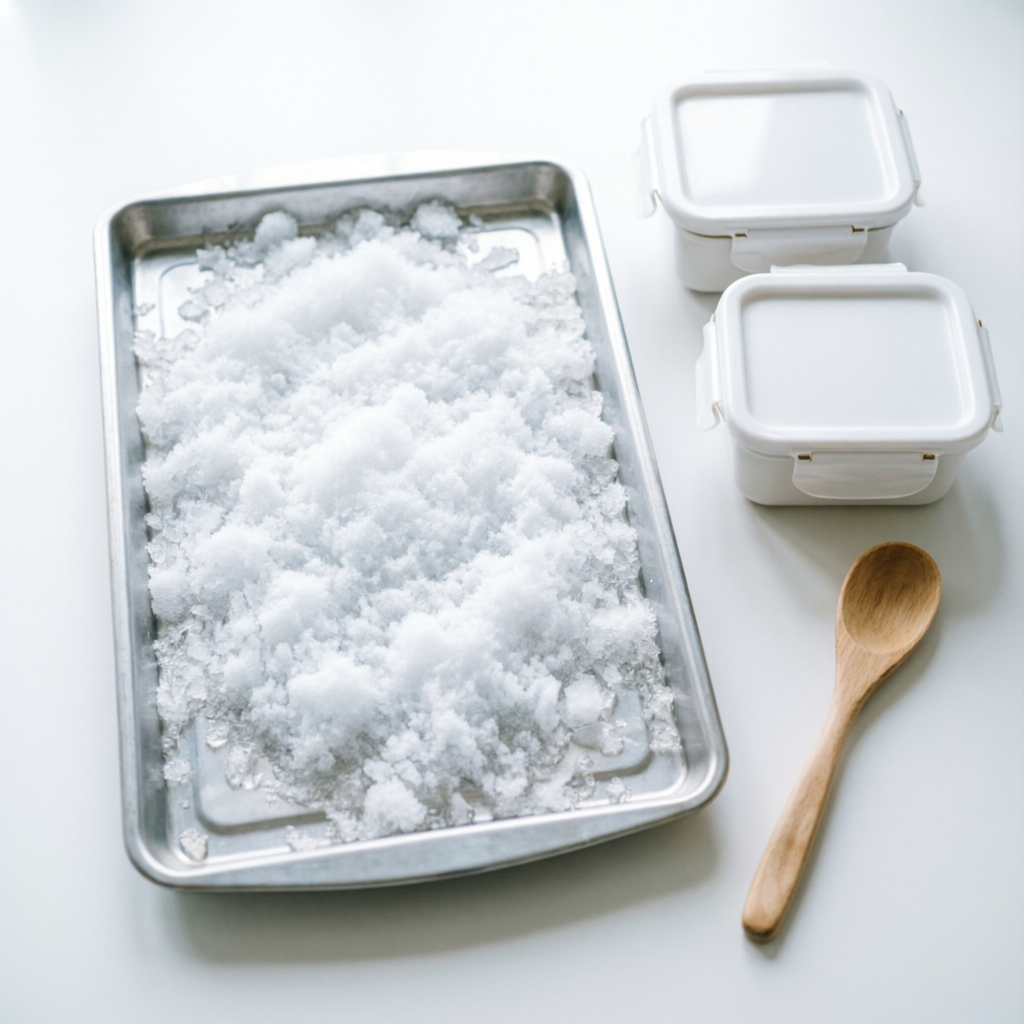
Step 4: Refreeze For Perfect Texture
Spread your blended frost on a baking sheet. Make a thin, even layer. Do not pile it up.
Place the baking sheet in your freezer for 30-60 minutes. This step is important because it:
- Prevents clumping
- Creates the perfect crunchy texture
- Makes the frost last longer
After refreezing, your ice is ready to eat.
How To Keep Your Ice-Making Area Clean?
The most important step is cleanliness. Keep your ice-making area clean. Wash your hands before handling ice.
When you are making ice, use clean utensils. Do not touch the ice with your hands. Use clean tongs or a spoon.
Apply food-safe sanitizer to your work surfaces to help keep bacteria away from your ice.
Why Do People Crave Freezer Frost?
Many people experience ice cravings, and I, for one, am going through that phase. This condition is called pagophagia and is often linked to iron deficiency anemia.
Others crave ice for sensory reasons. For me, the crunch and cold provide comfort and stress relief.
You will find that making safe freezer frost helps satisfy these cravings because it is better than chewing hard ice cubes that damage teeth. Plus, it has no calories, making it the perfect water snack.
Soft freezer frost is gentler on teeth, and it melts quicker, providing the same satisfaction without the risk of cracked teeth.
Equipment That Helps
You do not need expensive equipment. However, some tools make the process easier:
High-Powered Blender: A blender rated for ice crushing is essential. Look for models with strong motors and stainless steel blades.
Silicone Ice Trays: These release ice easily. They are flexible and durable.
Airtight Containers: Keep your frost fresh and prevent freezer burn.
Clean Towels: Essential for drying equipment and catching melting ice.
Measuring Cups: Help you portion water for consistent ice cubes.
Conclusion
Making freezer frost at home is simple and safe. Yet you must follow proper steps. The popular way is to buy a freezer and a humidifier just for freezing and eating. But you can also take ice cubes and blend them until soft.
You can still enjoy crunchy, satisfying freezer frost without the risk. Just remember to keep everything clean, use filtered water, and blend in small batches.